

How To Install 3 Way Dimmer Switch For Led Lights
How to Install a Dimmer Switch
How to Install a Dimmer Light Switch
![]() Time
Time
A total mean solar day
![]() Complexity
Complexity
Intermediate
![]() Cost
Cost
Less than $20
Introduction
There's more than to changing a switch than connecting a few wires. You accept to check grounding and box size for a condom, excellent job. Information technology's piece of cake to install a dimmer switch, simply make sure to upgrade the wiring if necessary to make information technology safer and meet Electric Lawmaking requirements. We'll bear witness you how to assure a rubber installation.
Tools Required
Materials Required
- Dimmer switch
- Wire connectors
Getting Started: Tools and Ability
It doesn't accept long to replace an ordinary calorie-free switch with full-characteristic dimmable switches. Merely while y'all're at it, to make your home safer, you should upgrade the wiring to meet the latest requirements of the National Electrical Code. Our step-by-step instructions will prove you how to install the dimming switch, concentrating on details that will guarantee a safe installation.
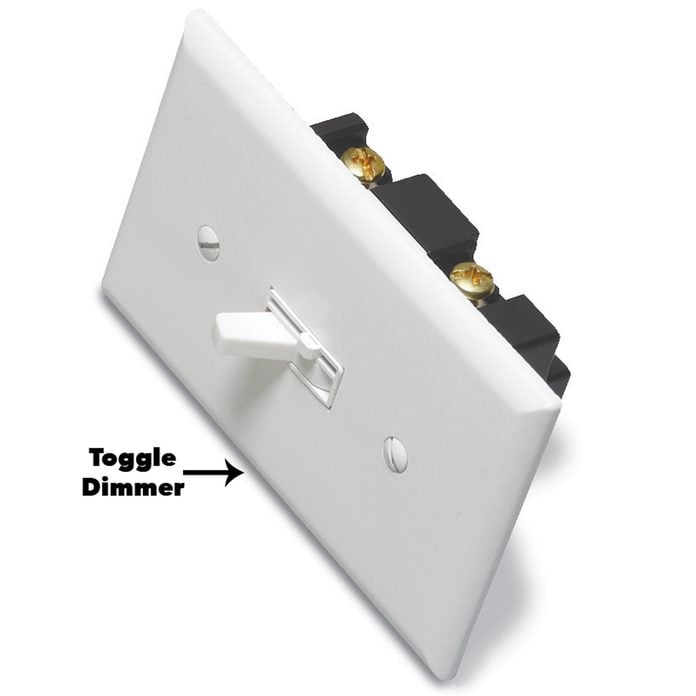
The tools you'll need to install a toggle dimmer switch are cheap and will come in handy for all your electrical projects. You'll demand a screwdriver, wire stripper, cheap (2 lead wire type) voltage tester and needle-olfactory organ pliers to install a dimmer.
Wiring problems and mistakes are all too common, and if left uncorrected have the potential to crusade short circuits, shocks and even fires. Here are the pinnacle 10 electrical mistakes people make and how to set what you lot detect.
Projection step-by-step (12)
Pace one
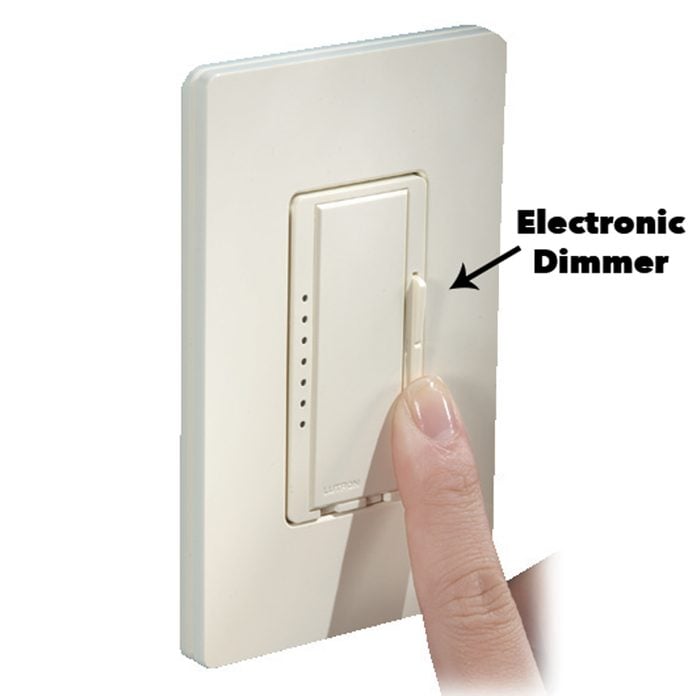
Choosing a Dimmer
At that place are several types of dimmer switches out in that location. Nosotros evidence the unmarried switch only at that place are too three-way dimmers, CFL and LED dimmer switches.
Stride two
Check for Hot Wires

To begin, plough off the power and double-check for hot wires in the box. Turn on the light and have a helper watch as you lot switch off the circuit breakers, or unscrew the fuses one at a time until the light goes out. Get out this circuit turned off while you piece of work.
We're using a non-contact voltage detector to double-check for voltage before removing the dimming switch. We prefer this blazon of tester because information technology'll find voltage without direct contact with the metal conductor. That's huge—it means you can check potentially hot wires before you handle them.
Hold the tip of a non-contact voltage detector well-nigh each screw terminal to be sure the ability is off. After you unscrew the switch and pull it away from the box, probe around inside the box with the detector to make sure there are no other hot wires from another circuit.
Plus, learn how to troubleshoot a dead outlet here.
Call an electrician if the original switch is connected to ii white wires. This may indicate a dangerous switched neutral. Also, if you have aluminum wiring, don't mess with it! Phone call in a licensed pro who is certified to work with it. This wiring is dull grey, non the wearisome orange that'southward feature of copper.
![]()
Footstep iii
Common Metal Box Sizes

Too many wires and devices stuffed into a box can cause dangerous overheating, short-circuiting and fires. The National Electric Code specifies minimum box sizes to reduce this risk.
To effigy the minimum box size required by the electric code, add one for each hot and neutral wire entering the box, i for all the ground wires combined, i for all the clamps combined, and 2 for each device (switch or receptacle) installed in the box. Multiply this figure by ii for 14-gauge wire and 2.25 for a 12-estimate wire to get the minimum box volume in cubic inches.
To aid determine the gauge of the wire in your switch box, await at the amperage of the circuit breaker or fuse in the main electric panel. 15-amp circuits are usually wired with fourteen-guess wire and 20-amp circuits require 12-gauge or heavier wire.
Compare the figure you lot get with the volume of your existing box. Plastic boxes have the book stamped inside, usually on the back. Steel box capacities are listed in the electric lawmaking. We've listed the volume of the most common steel boxes in the chart to a higher place.
Step 4
Make Sure the Box is Big Enough

If yous have a steel box, measure the height, width and depth of it to determine the box volume and consult the chart to see if it'south large enough. Plastic boxes accept their volume stamped inside. If your box is too small, replace it with a larger one. It's possible to supersede a box without cut away the wall, only it'south a catchy job. Nosotros recommend just removing almost a 16-in. square of drywall or plaster and patching information technology after the new large box is installed.
Tip: If the circuit breaker is labeled "15 amp, " the wires are probably 14-gauge, or 12-gauge for twenty-amp circuit breakers.
Step five
Examination Your Ground Earlier Y'all Connect It
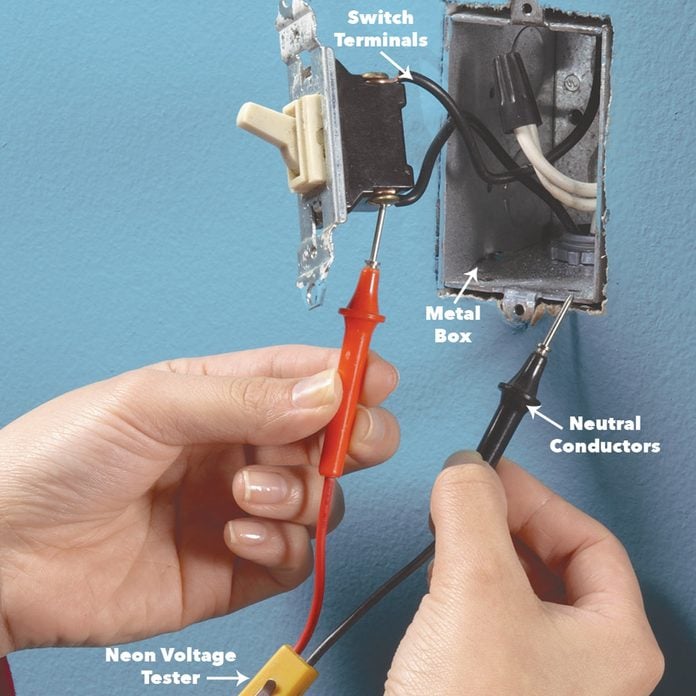
New dimmers have either a light-green grounding wire or a green ground screw that you'll take to connect to a grounding source if one is available. Houses wired with plastic-sheathed cable almost always accept bare copper ground wires that you'll connect to the toggle dimmer switch. But exam outset using a neon voltage tester to verify that the wire is connected to a ground.
Some wiring systems, like ours, rely on a metal conduit for the ground. If you accept one of these systems, test the metal box with a neon voltage tester to verify that it's grounded. If it is, attach a short ground wire to the metal box with either a metal grounding clip or a green grounding spiral screwed into the threaded pigsty in the back of the box. And then connect it to the dimmer.
If testing reveals your box isn't grounded, you tin can yet install the dimmer, only you must use a plastic embrace plate and brand sure no bare metal parts are exposed. Exam information technology over again for a ground. Turn the power dorsum on. Then place the leads of a voltage tester between each screw terminal and the metal box. If the tester lights, the box is grounded.
Turn off the power again earlier proceeding.
Footstep 6
Install the New Dimmer and a Grounding Clip
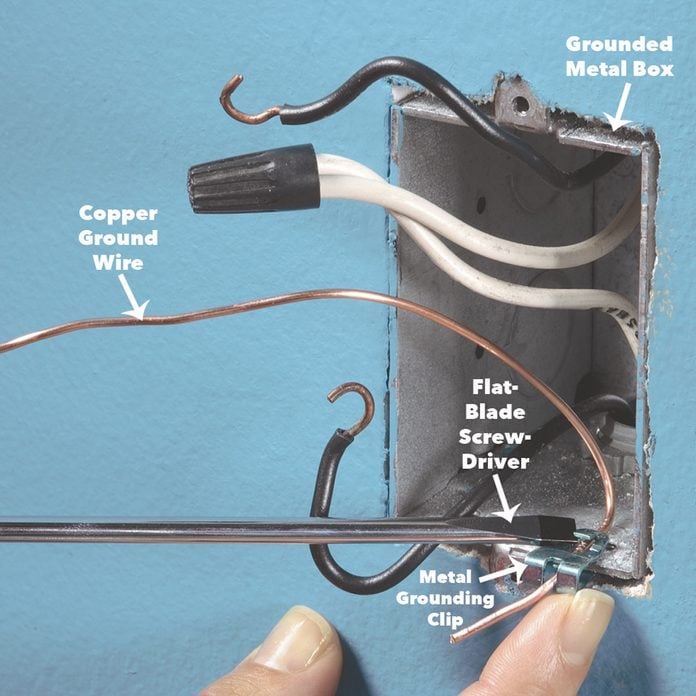
The steps are basically the same for how to install a switch. Printing a grounding clip and 6-in. length of bare copper wire onto the metal box with a screwdriver. Cut away a little bit of drywall under the box to provide clearance for the prune.
Pace 7
Compression the Wire Terminate
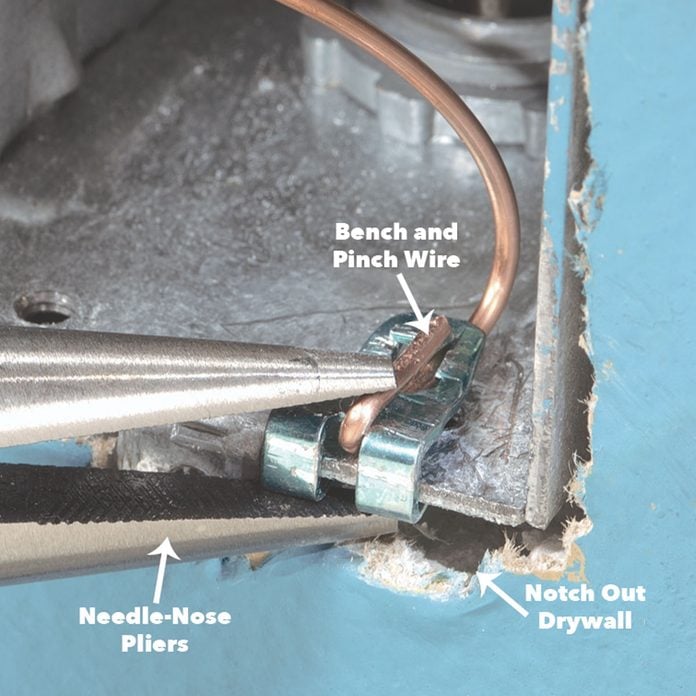
Bend the ground wire back onto the prune and squeeze information technology downward tight then information technology won't interfere with the dimmer switch.
Step 8
Strip New Wire Ends

Clip off the bent end of each wire with the wire cutter. Strip 3/8 in. of insulation from the end of the wires.
Learn how to properly prep wire.
Stride 9
Connect the Wires
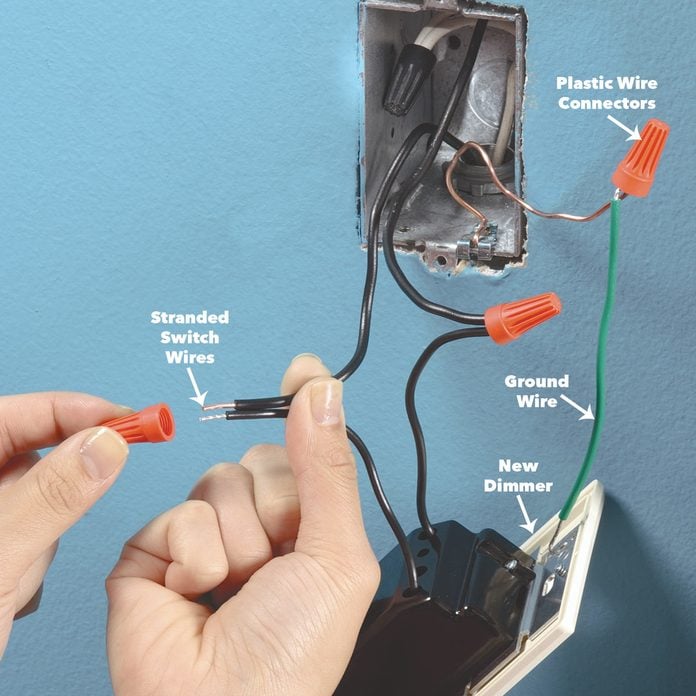
Some dimmers, like the i we're installing, have stranded wires fastened. Hold the wires together with the stranded wire protruding most i/8 in. beyond the solid wire. Friction match the size of the wire connector you're using to the size and number of wires beingness connected. Check the manufacturer'southward specifications on the packet to exist certain. Twist a plastic wire connector clockwise onto the wires to connect them. Finish twisting when the connector is snug.
Other dimmers have screw terminals instead of the attached stranded wires to the new dimmer. For the dimmers with screw terminals, strip three/4 in. of the insulated covering from the wires in the box and curve a loop in each with needle-nose pliers. Place the loop clockwise around the screw terminals and close the loop around the screws with the needle olfactory organ pliers. Then tighten the screws.
Step 10
Attach Comprehend Plate for the Wall Dimmer Switch
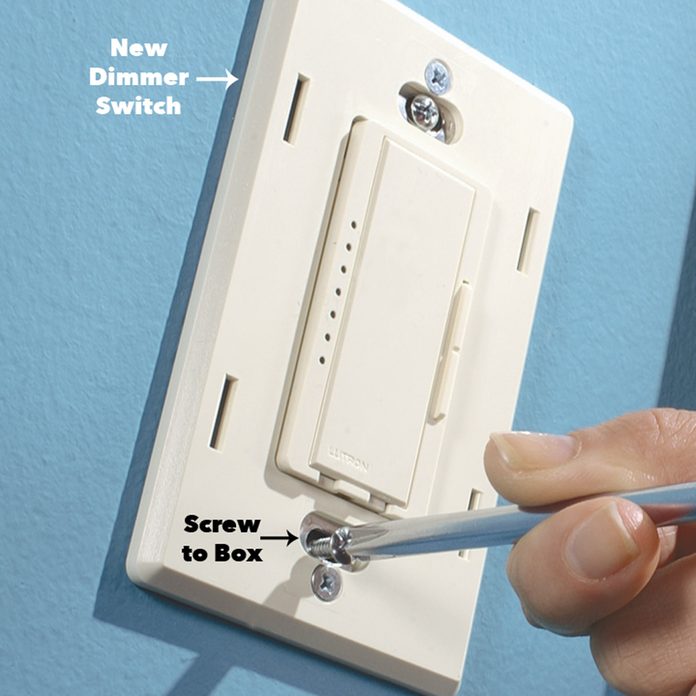
Fold the wires neatly into the box. Screw the dimmer to the box with the screws provided. Finish the task by installing the comprehend plate and turning on the power to examination the new dimmer.
It doesn't affair if you opposite the two switch wires to a single-pole dimmer. But if you're replacing a three-way switch with a three-way dimmer, label the "common" wire (it'll be labeled on the erstwhile switch) when yous remove the old switch so yous tin can connect it to the "common" terminal on the dimmer.
Plus, learn how to change a single-pole switch to a 3-mode switch.
In most cases, the two switch wires volition exist some color other than green or white, commonly black. But one of the wires may be white if your house is wired with plastic-sheathed cablevision. Put a wrap of black tape effectually the white conductor to label information technology equally a hot wire.
Step 11
Buying Dimmers
If the switch you're replacing is the only switch controlling the light, buy a standard single-pole dimmer. If the light can exist switched on and off from two or more switches, buy a 3-way dimmer switch. Merely you won't be able to dim the lights from every switch location unless you buy a fix of special dimmers with avant-garde electronics and install one at each switch location.
Step 12
Watts
Well-nigh dimmers are designed to handle 600 watts. Add up the wattage of all the light bulbs you'll exist dimming. And so read the dimmer package to make sure it tin handle the load. Heavy-duty i,000- and 1,500-watt dimmers are also readily available. Read the package if yous'll be installing dimmers side by side in the same electrical box because the wattage rating is reduced to compensate for extra rut buildup.
Finally, y'all have to use a special device, not a dimmer, to command the speed of ceiling fans and motors. Nearly fluorescent lights can't be dimmed without altering the fixture.
Whether you're looking to add together a low-cal fixture or run rough electric for an add-on, here are ten key facts that your electrician wishes you knew.
Originally Published: Nov 26, 2022

Source: https://www.familyhandyman.com/project/how-to-install-a-dimmer-switch/
Posted by: whitttiver1990.blogspot.com
0 Response to "How To Install 3 Way Dimmer Switch For Led Lights"
Post a Comment